- Type
- Lesson plan
- Grade
- Primary (Grades 3-5)
- Ages
- Ages 8-10
- Skills
- Critical thinking
How can we use code and simple machines to control water flow and solve an engineering challenge?
Overview
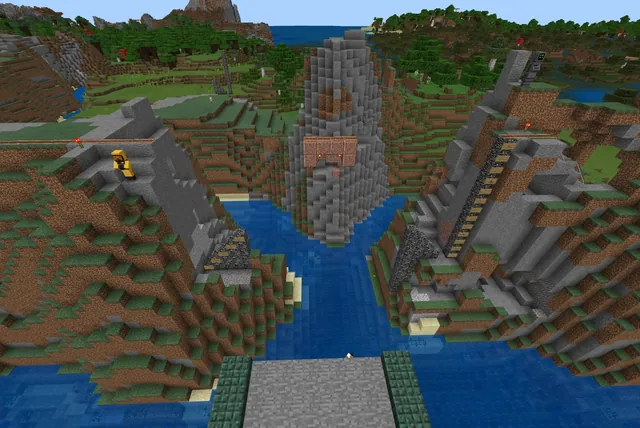
In this engineering challenge, students explore how dams and floodgates manage water flow to solve real-world problems. By creating a barrier that halts water in a ravine, students make it possible for villagers to reach and mine exposed gold ore safely. Before constructing the final structure, students follow the engineering design process by planning, testing prototypes on a model foundation, and planning for failure points.
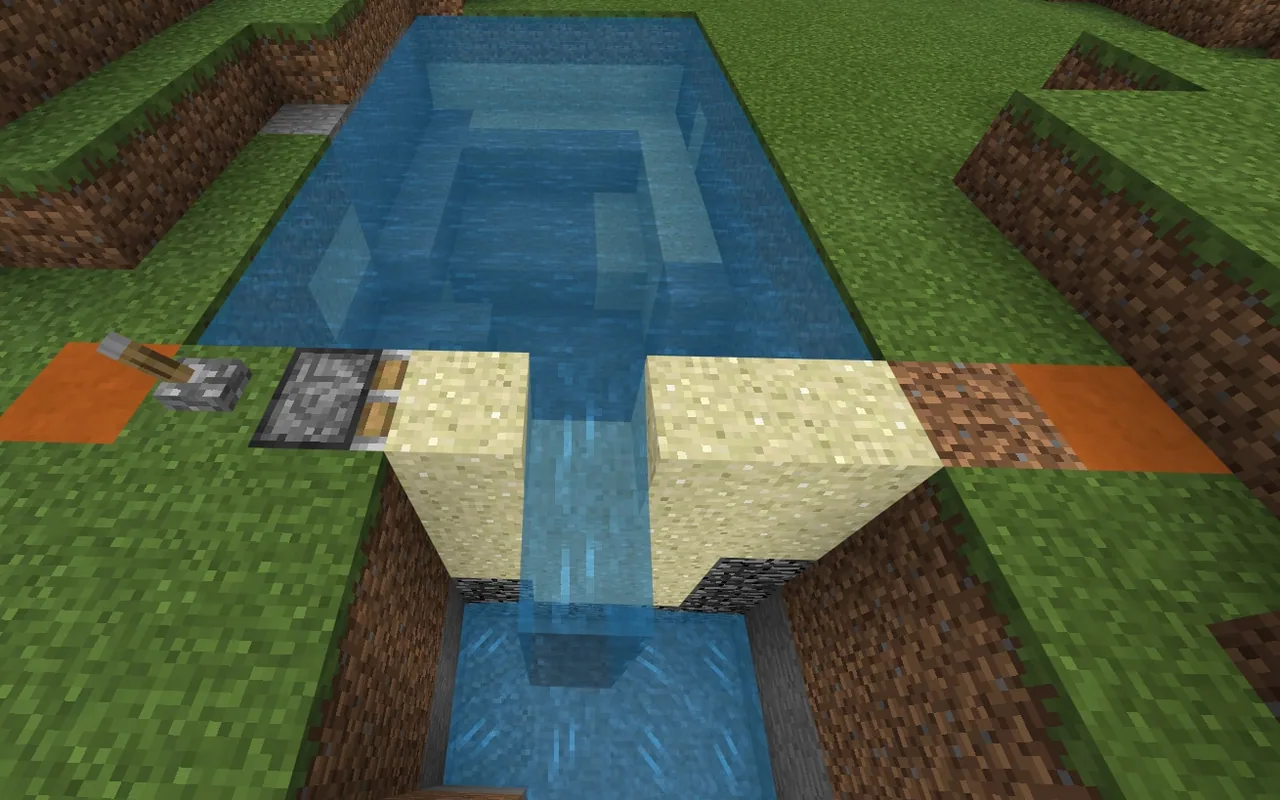
Using Minecraft Education's Code Builder, learners write chat-triggered programs that command their Agent to position and place sand blocks automatically. Once the primary dam structure is established between designated markers, students install a mechanical floodgate with a sticky piston and lever, demonstrating how controlled mechanical systems can hold back or release water on demand.
Learning objectives
By the end of this lesson students will be able to:
- Calculate the number of sand blocks required to build a dam between the red sandstone markers.
- Program the Agent to navigate and place blocks using chat commands in Code Builder.
- Construct and test a prototype dam using the model foundation in the workshop area.
- Build a working floodgate using a sticky piston and lever to regulate water flow.
Blocks and items used in this lesson


Key vocabulary
- Prototype
- A preliminary model built to test designs and identify flaws before building the final version.
- Agent
- A programmable helper in Minecraft that can move, turn, and place or break blocks.
- Sticky Piston
- A mechanical block that extends and retracts when powered, capable of pulling attached blocks.
- Chat Command
- A text prompt entered by a player that triggers a pre-programmed set of code instructions.
Before class
Lesson sequence
- Site Investigation
Direct students to inspect the ravine site where water must be held back to expose gold ore. Students measure the gap between the two red sandstone boundary blocks and note that the dam must sit directly on top of the bedrock foundation to calculate how many sand blocks they need.
- Workshop Prototyping
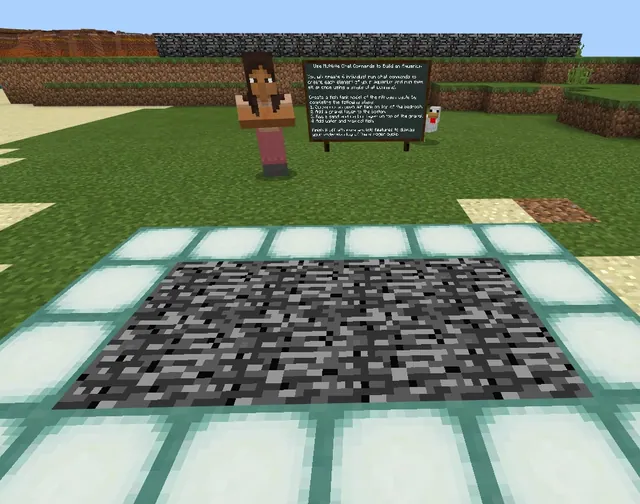
Students relocate to the workshop area to build a prototype dam on the provided model foundation. They open Code Builder to assemble commands: on chat command, agent teleport to player, agent [place on move] <true>, and agent move.
- Ravine Dam Construction
Working individually or in pairs, students apply their tested code at the actual ravine. They run their chat commands to position the Agent and place the sand blocks across the bedrock layer until water flow is stopped.
- Floodgate Engineering
Students install a floodgate mechanism by connecting a top-row sand block to an extended sticky piston operated by an adjacent lever. They test the mechanism to ensure flipping the lever retracts the piston and pulls the sand block away to release water.
- Demonstration and Reflection
Learners run their code with the teacher present and share screenshots documenting their tests and failed attempts. Wrap up by discussing how math helped determine material needs and how students debugged faulty code.
Assessment: success criteria
- The student accurately calculates the number of sand blocks required to close the gap between the red sandstone markers.
- The student writes and executes chat commands that successfully direct the Agent to place blocks while moving.
- A working prototype is constructed and refined in the workshop area prior to full installation.
- The floodgate functions properly, using a sticky piston and lever to pull the sand block and let water flow.
Differentiation
Pair students together and provide an explicit sequence showing how to enable place-on-move before assigning direction and step counts to the Agent.
Encourage students to create multiple distinct chat commands to handle different rows or test alternative code layouts to optimize placement speed.
Knowledge check
5 questions to check understanding after the lesson. Tap an answer to see if it is right; the score appears at the end.
1Where must the sand dam be built in the ravine to stop the water?
Answer: B. The source specifies that the dam should be built across the ravine between the two red sandstone blocks on top of the bedrock.
2What happens when the lever next to the extended sticky piston is activated?
Answer: A. Pushing the lever retracts the sticky piston, which pulls the attached sand block out of the top row to let water flow.
3What is the primary purpose of visiting the workshop area first?
Answer: C. The workshop contains a model foundation where students test their designs and prototype their dam before building in the ravine.
4Which command tells the Agent to deposit blocks continuously while it walks?
Answer: C. Setting 'agent [place on move] ' instructs the Agent to lay down blocks as it travels.
5Why do the villagers need the water stopped by a dam?
Answer: D. The source notes that building the dam and adding a floodgate allows villagers to access and mine gold ore.
Resources
- Lesson package (.zip)Everything the author attached to this lesson in one download.
- World FileWorld file for student use
Part of the Code for STEM curriculum
This is lesson 3 of 20 in Code for STEM.
- 3-D Fractions
- Aquarium
- Build a Dam
- Canyon Arch Bridge
- Chicken or the Egg
- Creeper Tower Test
- Energy Transfer
- Forces
- Hour of Code: AI for Good
- Minecraft Code Town
- Molecules
- Number Line Railroad
- Plate Motions
- Road Construction Ahead
- Scale
- Slope
- Surface Area and Perimeter
- Units of Measurement
- Walled Fortress
- Wave Properties
Frequently Asked Questions
What components are needed to create the floodgate?
Students only need a sticky piston, an adjacent lever, and a sand block positioned in the top row of their dam structure.
Can students work in groups for this lesson?
Yes, students can complete the dam and floodgate challenges either individually or in pairs.
Adapted from Build a Dam by John Miller on Minecraft Education, last updated Feb 24, 2022. This classroom version, the timings and the quiz were written by 9Minecraft Education.