- Type
- Lesson plan
- Ages
- Ages 8-13
- Includes
- Quiz: 5 questionsLesson files
How can you translate a two-dimensional grid blueprint into a digital sculpture that communicates your personal identity?
Overview
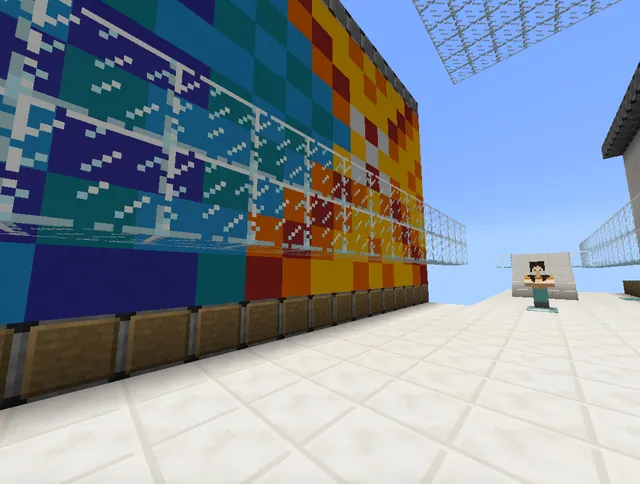
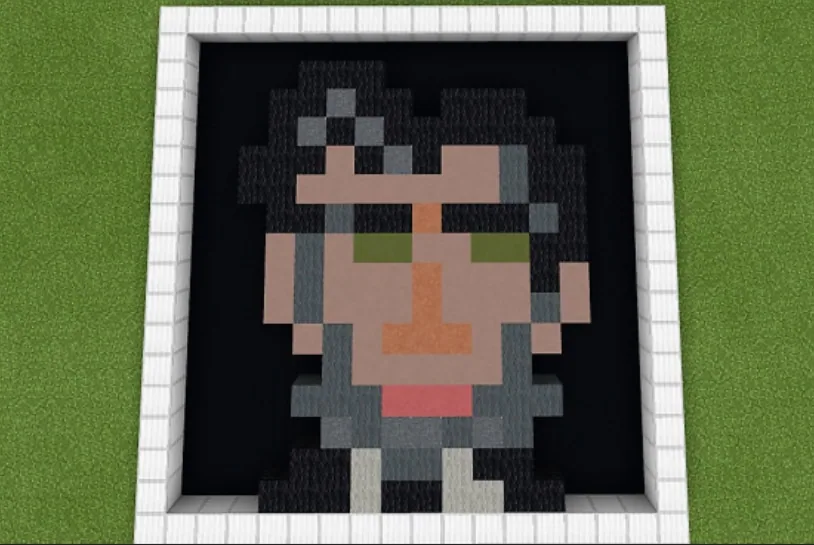
This visual arts and digital literacy lesson guides students to translate a two-dimensional grid-paper self-portrait into a digital art piece in Minecraft. Building on earlier work with colour and balance, learners decide how to interpret their blueprints through block selection, dimensional depth, spatial positioning, and potential framing.
Students work either in an assigned area within a shared Portrait Gallery world or on an individual grass template. Throughout the building process, learners document their progress using the in-game Camera and Portfolio, construct dedicated viewing benches to highlight optimal audience vantage points, and export their documentation to OneDrive.
Learning objectives
By the end of this lesson students will be able to:
- Recreate a grid-paper portrait blueprint as a digital art installation in Minecraft.
- Apply visual arts principles of balance and colour choice to communicate personal meaning or naturalistic features.
- Construct viewing benches that guide spectators to intentional viewing angles.
- Document the build process at the beginning, middle, and end using the Camera and Portfolio, exporting the final record to OneDrive.
Blocks and items used in this lesson


Key vocabulary
- Balance
- Arranging elements such as space and colour to give an artwork an impression of equal visual weight or importance.
- Visage
- A person's face or facial expression, serving as the subject of a portrait.
- Portfolio
- An in-game item used to store, caption, and export photographs taken during a project.
- Viewing Bench
- A constructed seating spot designed to position audience members at a specific angle to experience an artwork.
Before class
Lesson sequence
- Planning and Guiding Questions
Review the prerequisite grid-paper selfies. Prompt students to analyze their design choices before placing blocks: will materials be chosen strictly from the blueprint or for deeper personal meaning? Will the build sit on the ground, float, or combine both? Will it remain a single-block flat selfie or become a 3D sculpture? Will it feature a custom frame?
- Gallery Setup and Etiquette
Have students enter the assigned Portrait Gallery world or launch an individual Blocks of Grass template. Review gallery etiquette for shared worlds: students must build only in their assigned zones and must never alter or destroy blocks placed by other artists.
- Digital Art Construction and Documentation
Students construct their portraits using their chosen blocks and dimensions. Remind students to use the in-game Camera and Portfolio to photograph their work at three distinct stages: the beginning, the middle, and upon final completion.
- Building Viewing Benches
Once the portrait is complete, students design and build one or more viewing benches. These benches must mark the best or most interesting angles for visitors to experience the artwork. Students sit or stand at each bench to take point-of-view photographs for their portfolio and add descriptive labels.
- Portfolio Export and Review
Students proofread their portfolio entries, sign their work, and export the file to OneDrive. They share their exported portfolios with the teacher and peers to explain their artistic choices.
Assessment: success criteria
- The student creates a Minecraft portrait that reflects their grid-paper blueprint while demonstrating considered choices in colour and balance.
- The student captures and labels photographs showing the beginning, middle, and final stages of construction in their Portfolio.
- The student constructs viewing benches and includes audience point-of-view photographs taken from those locations.
- The student exports a completed, signed Portfolio to OneDrive and explains their artistic decisions.
Differentiation
Allow learners to focus on building a flat, single-block-deep portrait directly on the ground matching their grid paper cell-for-cell before attempting frames or extra depth.
Have advanced learners record a tutorial video explaining how to craft a portrait in Minecraft to teach others.
Knowledge check
5 questions to check understanding after the lesson. Tap an answer to see if it is right; the score appears at the end.
1What should students complete before starting this lesson?
Answer: B. The prerequisite activity requires students to create a selfie on grid paper demonstrating colour and balance.
2What is an essential rule when working in a shared Portrait Gallery world?
Answer: C. The lesson requires students to respect peers' spaces and explicitly prohibits creating or destroying blocks in others' areas.
3Which in-game tools are used to record the creative process?
Answer: C. Students are instructed to take photos and document their work using the Camera & Portfolio.
4Why do students construct viewing benches near their completed builds?
Answer: A. Viewing benches are built to communicate the most compelling angles from which visitors should view the artwork.
5Where do students export their finished Portfolio to share it with their teacher and peers?
Answer: D. The student steps specify proofreading, signing, and exporting the Portfolio directly to OneDrive.
Resources
Frequently Asked Questions
What options exist if a shared classroom server is unavailable?
Students can load a standard Blocks of Grass template and complete their portrait, viewing benches, and portfolio documentation in an individual single-player world.
Must the digital portrait remain strictly flat like the original drawing?
No. Students are encouraged to decide whether their work remains a flat one-block-deep piece or expands in width and depth to become a three-dimensional sculpture.
Adapted from Selfie, Minecraft-Style Part 2 by Jan Lewis on Minecraft Education, last updated Nov 18, 2020. This classroom version, the timings and the quiz were written by 9Minecraft Education.