- Type
- Lesson plan
- Topics
- ScienceDigital Literacy
- Ages
- Ages 6-13
- Includes
- Quiz: 5 questions
How can we collaborate as a team to design and build an interconnected model of the human body and its organs?
Overview
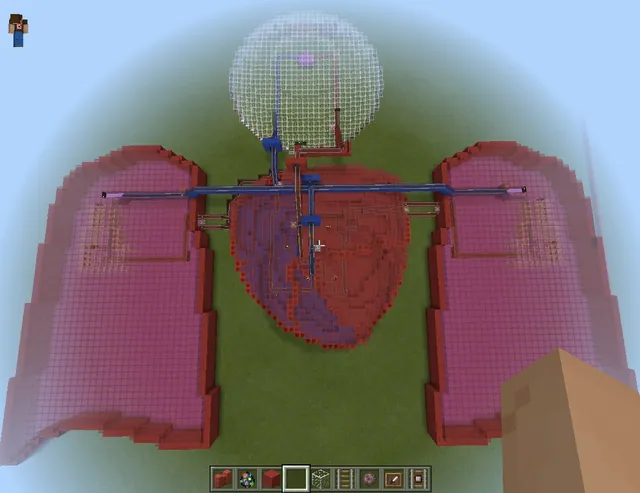
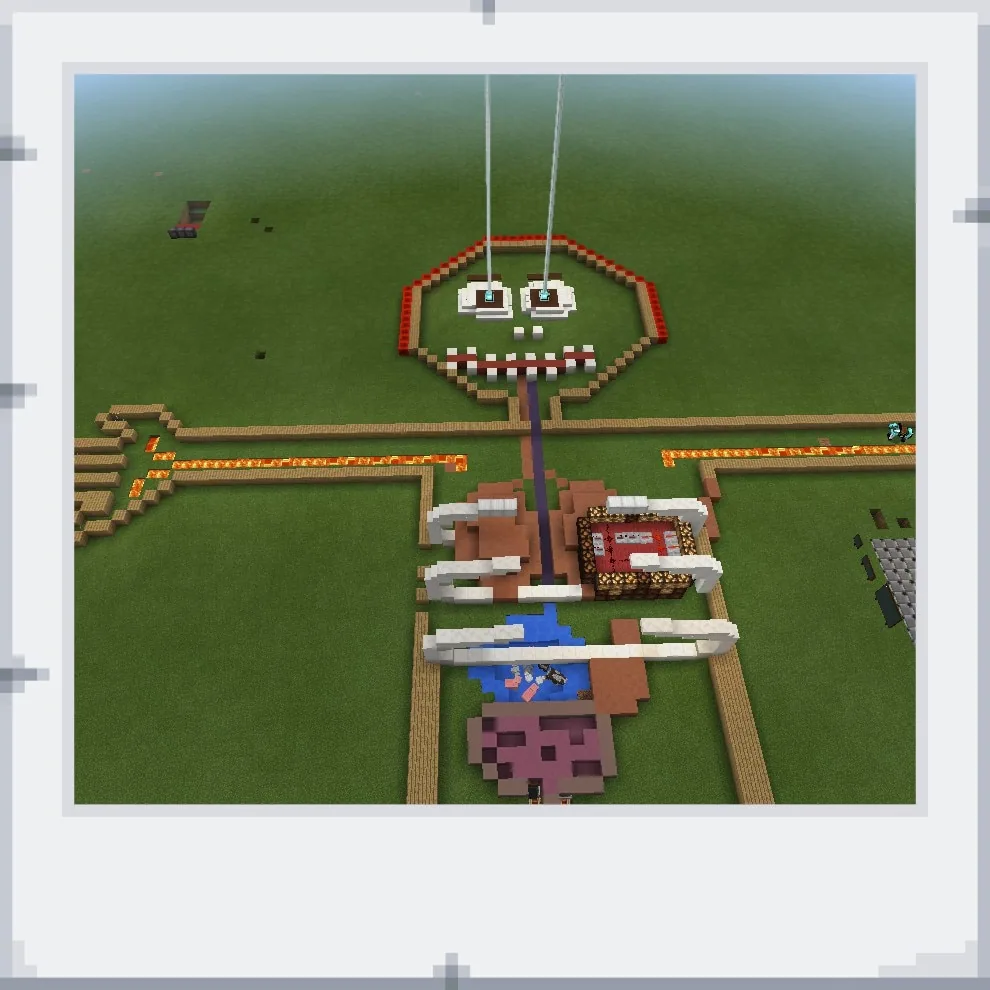
This collaborative science project invites an entire class to take charge of exploring human anatomy by constructing a shared model of the human body called Fred. Rather than passively studying diagrams, students take on research and building roles to figure out how organ systems fit together, link with one another, and perform essential life functions.
Using Minecraft Education in Creative mode, students employ various construction materials and redstone circuits to simulate the actions and connectivity of internal organs. Progress is captured through in-game cameras and portfolios, allowing learners to document their research and reflect on their collective engineering and biological problem-solving.
Learning objectives
By the end of this lesson students will be able to:
- Identify key internal organs and explain their biological functions.
- Collaborate as a unified class team to build a complete human body model.
- Represent the functions and connections of organs using Minecraft blocks and redstone.
- Document construction progress and scientific findings using the in-game camera and portfolio.
Blocks and items used in this lesson


Key vocabulary
- Organ
- A distinct part of the body that carries out a specific biological task or function.
- Redstone
- A Minecraft material used to construct circuits, power components, and simulate mechanical operations.
- Border Block
- A special administrative block that restricts player movement across a designated boundary.
- Worldbuilder
- A permission setting that lets players place instructional items such as boards, posters, slates, and NPCs.
Before class
Lesson sequence
- Spawn Brainstorming and Role Assignment
Students log in and find themselves inside the bordered spawn area. Learners place signs across the space to record everything they already know about the human body. As a whole group, the class reads the signs and discusses which core organs must be included, how the body will be oriented, and which students will research specific parts.
- Releasing and Equipping Learners
The teacher breaks the border blocks to release the class. The teacher runs /give @a Camera and /give @a Portfolio to equip every learner. Students needing to place decorative labels, boards, slates, or NPCs receive worldbuilder status using the command /ability <name> worldbuilder true.
- Research and Collaborative Construction
Students investigate their assigned organs to determine their visual appearance, biological purpose, and links to neighboring systems. Working as one large team, students place blocks and redstone inside Fred to represent these functions, taking photos with their cameras and recording captions in their portfolios as work progresses.
- Documentation and Project Reflection
Students export their completed portfolios to preserve their photos and notes. Learners can import these visual records into presentation tools, interactive slide decks, or text documents using Word or Sway to produce educational books or project diaries detailing how Fred was built.
Assessment: success criteria
- Students accurately identify and display the names and functions of assigned organs within the model.
- Students demonstrate active teamwork, shared responsibility, and joint decision-making during construction.
- Students simulate organ connections and biological actions using appropriate blocks and redstone.
- Students produce a documented portfolio or presentation with photos and captions explaining their work.
Differentiation
Pair students together to focus on researching and building simpler, easily recognizable organs before placing them inside the body frame.
Challenge advanced students to engineer complex redstone circuitry that simulates dynamic organ processes or create a multi-modal presentation teaching younger peers about Fred.
Knowledge check
5 questions to check understanding after the lesson. Tap an answer to see if it is right; the score appears at the end.
1What is the primary collaborative goal of the lesson?
Answer: B. The lesson centers on the entire class collaborating to construct a single human body model called Fred.
2Why does the teacher initially place border blocks around the spawn point?
Answer: C. Border blocks are used at spawn to hold all students together while they place brainstorm signs and make group decisions.
3Which two items are given to every student to record their progress during the build?
Answer: A. The instructions direct the teacher to use slash commands to give every player a Camera and a Portfolio.
4Which command grants a student permission to place slates, posters, boards, and NPCs?
Answer: D. The lesson explicitly states that students who need to place boards, posters, slates, and NPCs require the worldbuilder true ability command.
5How are students expected to demonstrate the functioning of organs within Fred?
Answer: C. Guiding questions and assessment criteria ask students to use blocks and redstone mechanisms to model organ functions and linkages.
Frequently Asked Questions
What world settings should I select before launching this lesson?
Select Creative mode, enable cheats, turn on the Always Day toggle, and name the world Fred the Human Body.
How can students publish their learning after finishing the build?
Students can export their in-game portfolios and assemble their progress photos and captions into multi-modal reports, digital books, or interactive presentations using tools like Word or Sway.
How can I assess individual student learning during a giant group project?
Observe verbal interactions, read in-game chat logs, track active building contributions, and evaluate the photos and written captions each student records in their personal portfolio.
Adapted from Create Fred the Human Body! by Lynne Telfer on Minecraft Education, last updated Nov 20, 2016. This classroom version, the timings and the quiz were written by 9Minecraft Education.