What key components make up the Arduino Nano microcontroller board, and how do they function together?
Overview
The Arduino Nano is a compact, breadboard-friendly microcontroller board based on the ATmega328. In this lesson, students explore the physical architecture of microcontrollers by examining a scaled-up, interactive virtual replica of the board.
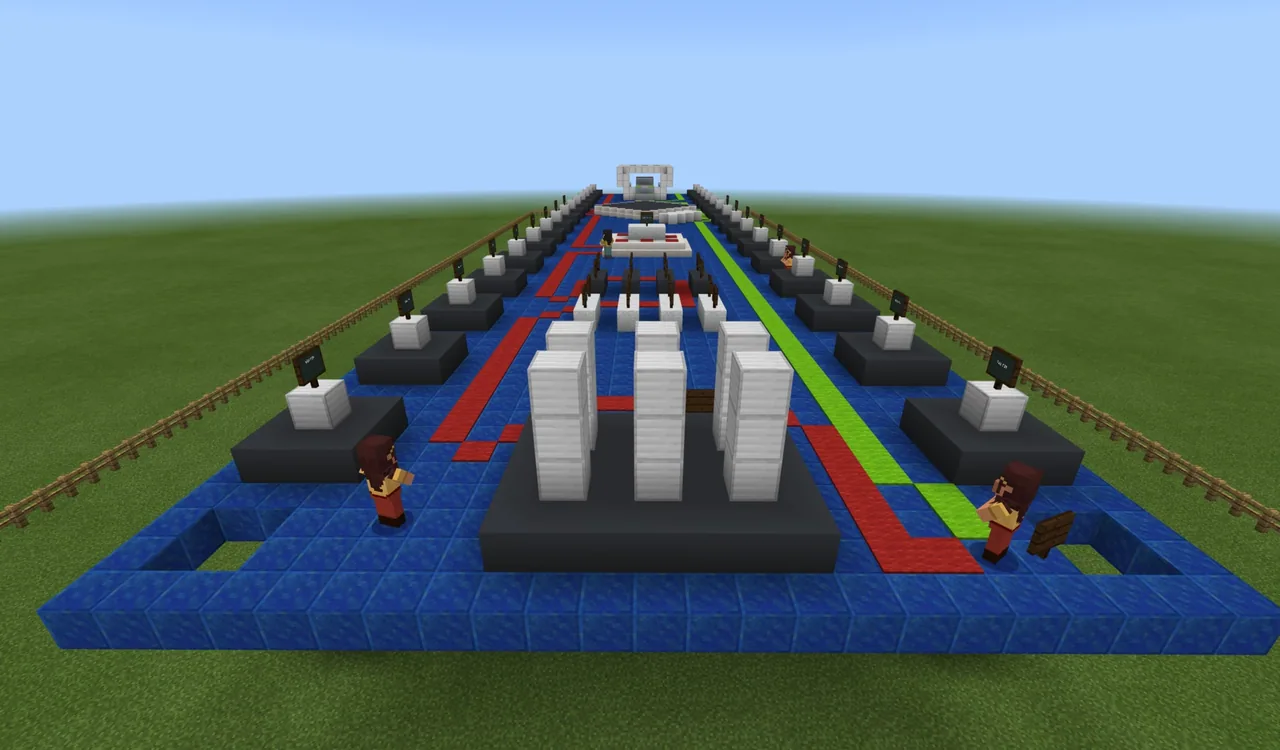
Students navigate a fenced pathway guided by colored carpets, inspecting key hardware components such as digital and analog pins, LEDs, resistors, ICSP pins, and the USB port. Using in-game cameras and portfolios, learners capture evidence of their findings and answer review questions along the route.
Learning objectives
By the end of this lesson students will be able to:
- Identify core components of the Arduino Nano including the ATmega328 microcontroller, pins, and USB port.
- Distinguish between analog, digital, PWM, and ICSP pin arrangements on the board.
- Document learning using the in-game camera and compile findings into an exported portfolio.
- Collaborate with peers to review and share technical documentation of the board layout.
Blocks and items used in this lesson


Key vocabulary
- Arduino Nano
- A small, complete, breadboard-friendly microcontroller development board.
- ATmega328
- The primary microcontroller chip that powers the Arduino Nano.
- Digital Pins
- Connectors that read or send binary signals (HIGH or LOW, on or off).
- Analog Pins
- Pins that can read varying voltage levels rather than simple on-off signals.
- ICSP
- In-Circuit Serial Programming pins used to program the microcontroller directly.
Before class
Lesson sequence
Suggested timing: about 60 minutes in total.
- Briefing and Equipment Collection10 min
Students spawn outside the fenced board area facing colored carpets. They read the instructional boards on the left, then visit the nearby NPC to collect a Camera and a Portfolio. Explain the mission: navigate the board, photograph components, and answer challenge questions.
- Component Exploration via Guided Path25 min
Students ascend the stairs and follow the green carpet trail along the board model. When the green carpet ends, they transition to the red carpet path. Along the way, students inspect:
- Analog and digital pins
- The ATmega328 microcontroller
- Resistors and LEDs
- The USB port and ICSP pins
Students take photographs of each key unit they discover.
- Checkpoints and NPC Challenges15 min
Learners interact with NPC checkpoints stationed on the tour. Students answer hardware questions concerning data transfer, pin counts, oscillators, and microcontroller type. Correct answers earn in-game rewards.
- Portfolio Assembly and Export10 min
After completing the path, students arrange their photographed components inside their Portfolio, add descriptive notes, and export the file to share their findings with classmates.
Assessment: success criteria
- Student successfully navigates the guided carpet route and captures photos of all required components.
- Exported portfolio clearly documents analog pins, digital pins, the ATmega328 microcontroller, and the USB port.
- Student correctly answers the assessment questions regarding pin counts, data transfer, and oscillator functionality.
Differentiation
Allow learners who struggle with navigation to walk the route in pairs so they can locate components and read NPC prompts together.
Have advanced students work in small teams to construct their own 3D Minecraft models of an Arduino Nano board.
Knowledge check
5 questions to check understanding after the lesson. Tap an answer to see if it is right; the score appears at the end.
1Which microcontroller chip serves as the basis for the Arduino Nano?
Answer: A. The Arduino Nano board is built based on the ATmega328 microcontroller.
2Which items must students collect from the NPC before touring the model?
Answer: C. Students are instructed to collect a camera and portfolio from the NPC to record their observations.
3How is the walking tour on the Arduino Nano model structured for students to follow?
Answer: B. Students follow the green carpet first and then transition to the red carpet where the green carpet ends.
4What happens when students correctly answer questions at the NPC checkpoints?
Answer: B. The lesson instructions specify that students win a gift for answering NPC questions correctly.
5Which component on the Arduino Nano board model is examined for data transfer?
Answer: D. The USB port is examined during the tour as the interface used to connect and transfer data to the Arduino Nano.
Resources
Frequently Asked Questions
Can students break or modify blocks while exploring the model?
No. The world should be configured in Survival mode with unchangeable world settings and border blocks along the fences to prevent students from modifying structures or straying off the path.
What should students do with their completed portfolios?
Once students have inserted their photos and documented the required board components, they export the portfolio file from Minecraft and share it with their peers or teacher.
Adapted from Arduino Nano Model by Kemal IKIZOGLU on Minecraft Education, last updated Jul 2, 2020. This classroom version, the timings and the quiz were written by 9Minecraft Education.