- Type
- Lesson plan
- Ages
- Ages 6-13
- Includes
- Quiz: 5 questions
How can we combine coordinate geometry, loops, and arrays to program a playable multi-level escape game?
Overview
In this three-part coding unit, students construct an escape arena mini-game inspired by retro arcade mechanics. Learners begin by plotting coordinate geometry on paper to determine the spatial dimensions of walls and obstacles, then translate their blueprints into executable code using nested loops and custom functions.
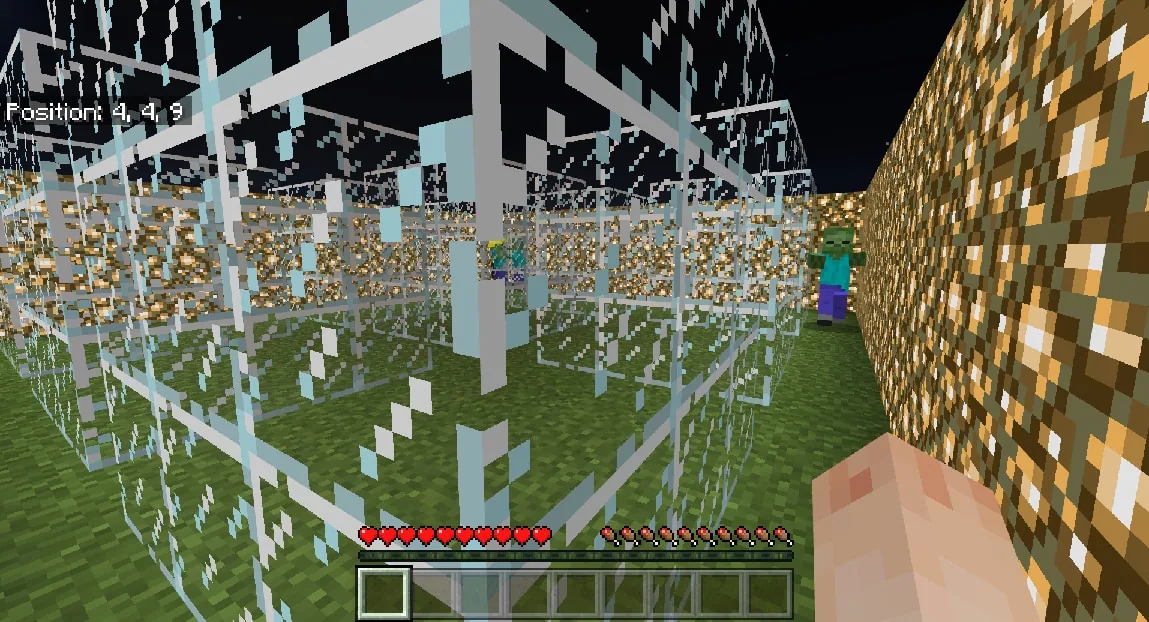
Using Minecraft Education as an interactive development platform, students build logic to control game difficulty and environment settings. By implementing arrays to store monsters and block properties, students create an escalating challenge where players must evade enemies in an increasingly opaque maze.
Learning objectives
By the end of this lesson students will be able to:
- Calculate and apply 3D coordinates to design arena boundaries and obstacle patterns.
- Build a 2D grid of interior obstacle cubes using two nested for loops.
- Program a gameplay initialization function that enforces survival conditions, world immutability, and entity spawns.
- Manage progressive difficulty across game levels by using arrays to control monster types and block transparency.
Blocks and items used in this lesson


Key vocabulary
- Coordinate Geometry
- A mathematical system where points in space are defined by sets of numerical values along axes.
- For Loop
- A programming command that repeats a block of instructions for a designated number of cycles.
- Array
- An ordered data structure that stores a collection of related values under a single identifier.
- Immutable World
- A world setting that stops players from breaking or placing blocks during play.
- Function
- A self-contained block of code designed to carry out a specific instruction set when called.
Before class
Lesson sequence
- Session 1: Arena Blueprint and Generation
Students plan the arena layout on paper, determining the exact 3D coordinates for outer walls, an exit, and internal obstacle cubes. After opening a Blocks of Grass world, students translate their design into code, using functions to build the walls and exit, and using two nested for loops to generate the cubes as a 2D array.
- Session 2: Game State and Core Mechanics
Students code a gameplay function that prepares the environment for a single-level survival game. The script sets the time to night, adjusts the difficulty to normal, switches the game mode to survival, and locks the world as immutable. Code is added to teleport the player to the entrance and spawn three monsters in the opposite corner.
- Session 3: Multi-Level Arrays and Progression
Students extend the project into a multi-stage game by using arrays to control different levels. They program arrays containing different monster types and block varieties, making blocks less transparent as difficulty increases. Finally, they add screen messages for level updates and logic that spawns a replacement monster whenever an enemy is defeated.
- Session 4: Testing and Individualization
Learners test each other's arenas to verify that the coordinate offsets, win conditions, and monster spawning function correctly. Students then customize their game by adding optional features such as custom mob varieties, timers, bonus items, or extra levels.
Assessment: success criteria
- Correct derivation and application of 3D coordinates and offsets for arena walls and obstacles.
- Successful execution of two for loops to construct a 2D array of cube obstacles.
- Proper configuration of the gameplay function establishing night, normal difficulty, survival mode, and an immutable world.
- Working level progression controlled by arrays for monster selection and decreasing block transparency.
Differentiation
Provide a pre-drawn coordinate grid to guide obstacle placement and loop count boundaries.
Challenge students to incorporate game timers, collectible bonus items, and additional custom levels.
Knowledge check
5 questions to check understanding after the lesson. Tap an answer to see if it is right; the score appears at the end.
1Which computational structure is used in Session 1 to generate the grid of cubes?
Answer: A. The cubes are created as a 2D array implemented using two for loops.
2How does block appearance change as players advance to harder levels?
Answer: B. The curriculum specifies using block types that become less transparent as difficulty increases.
3What initial design method is recommended before programming the arena in Minecraft?
Answer: C. The lesson advises deriving coordinates for walls and cubes using pen and paper before coding.
4Which combination of game settings must be configured in the Session 2 gameplay function?
Answer: D. Session 2 requires setting the time to night, difficulty to normal, world to immutable, and mode to survival.
5What occurs when a player defeats a monster in the arena?
Answer: C. Session 3 includes coding logic that spawns another monster if the player kills one.
Frequently Asked Questions
Why is this activity organized across three separate sessions?
The project contains a substantial amount of code. Spreading the build across three distinct sessions allows students to master core concepts step by step: spatial geometry and loops in session one, game state rules in session two, and data arrays for level progression in session three.
What world type is required to build this project?
Teachers should have students open a standard Blocks of Grass flat world, providing an unobstructed surface for mapping coordinates and running procedural code.
How do arrays improve the design of the game?
Using arrays allows students to automate multiple levels from a single codebase by storing lists of monster types and block variants rather than hardcoding each level individually.
Adapted from Oh Mummy! by Philip Golden on Minecraft Education, last updated Nov 1, 2018. This classroom version, the timings and the quiz were written by 9Minecraft Education.